
Here I cover what I’ve found of value for starting out as a backyard astronomer including what to know about the telescopes and binoculars for beginners.
The basics to Backyard astronomy
- Getting the right equipment as a beginner. A telescope is great for seeing fainter objects, but binoculars are easier to use and more portable. If you’re just starting out, I recommend starting with a good pair of binoculars.
- Finding a suitable location. Choose a place with dark skies, away from city lights. A park or nature reserve is a great option or somewhere elevated about the lights.
- Start stargazing. Start by looking for the brightest objects in the sky, such as the moon and planets. Use a star chart or app to help you identify constellations and stars. Have a notebook to jot down interesting observations.
- Knowing your equipment. When looking through your telescope or binoculars, be patient and take your time. Use a low magnification to start, and then increase it as you get more comfortable. Remember to focus carefully, and if you’re using a telescope, make sure to track the object as it moves across the sky.
Getting the right equipment for you
It’s important to think about the type of observation you want to do. Are you interested in looking at planets and other small objects, or do you want to take in the beauty of the night sky as a whole? This will help you determine whether you should invest in a telescope or a good pair of binoculars.
Binoculars add magnification for viewing the Moon’s surface and its features and to better acquaint yourself with many more night sky objects. They are also a useful companion when using a telescope.
Telescopes vs binoculars
The following are features that can make a difference in your experience and matter in deciding on a telescope or binoculars, or you could opt for both.
Telescopes:
- Larger apertures – gather more light and produce brighter, clearer images
- Designed for higher magnification – better suited for viewing distant objects like planets and galaxies
- Often require a mount or tripod to stabilize them and keep them pointed at the desired target
- Can be more complex to set up and use, especially for beginners
- Tend to be more expensive than binoculars, especially for larger or more advanced models
Binoculars:
- Smaller apertures than telescopes, but can still provide decent views of celestial objects
- Offer a wider field of view than telescopes, making them good for observing larger objects like star clusters and nebulae of the Milky Way
- Are generally easier to use and more portable than telescopes, making them a good option for beginners or for stargazing on-the-go
- Can be less expensive than telescopes, especially for entry-level models
- May not be able to achieve the same level of magnification as telescopes, which can limit their usefulness for certain types of observations
What to look for in binoculars
For binoculars, look for a pair with a magnification of around 7x or 8x and a wide field of view. Or, you could opt for 10x but be aware that the larger the magnification the heavier and more awkward they will be to hold while looking skyward.
What’s good about binoculars for stargazing:
- Multiple purposes — use them for daytime terrestrial pursuits as well as for night-time sky viewing
- Wide field of view — you can take in more of the sky than with a telescope — useful for finding objects
- Smaller and more portable than a telescope
What’s not so good about them:
- Hard to keep them steady for clear views (see my article on how to remedy this)
- Magnification only goes so far
There are many reasons to binoculars, including as an accessory to a telescope, as I explain in my article covering the uses of binoculars.
What to look for in a Telescope
For telescopes, the aperture (the diameter of the main lens or mirror) is a key factor in determining image quality, so you’ll want to go for the largest aperture you can afford.
The telescope size is governed by aperture. More light gathering means better sharpness and brightness of the image.
Think about your intended purpose, your ‘why’ and ‘how’, or your reason for using a telescope.
- Do you want to observe the finer details of the moon?
- Are you wanting to view large faint objects like galaxies?
- Do you want a telescope that is portable?
- Do you want to use it for viewing wildlife also?
Not to confuse you, but there are three main types of telescopes you should know about. These are common types for amateur astronomers:
- Reflector (uses mirrors)
- Refractor (uses lenses)
- Catadioptric (uses both mirrors and lenses)
My article on reflector vs refractor will give you more insight into how these two types differ and why you would choose one over the other.
A reflector often recommended for beginners is a Dobsonian, a simple design on a rocker-type mount and will give you more bang for your buck compared to others.
Catadioptric examples include the Maksutov-Cassegrain (MAK) and the Schmidt-Cassegrain (SCT) which are more compact but also more expensive types.
See Features to Consider When Buying a Telescope for more hints on what to look for.
Budget considerations
How much does a telescope cost? You’ll find telescopes for sale from under 100 to a few 1000 dollars for the backyard enthusiast.
Not wanting to outlay a lot at the start, many folk tend to look for telescopes under $200. Long-time amateur astronomer, Terence Dickinson, recommends looking between $300 and $500 for a good quality instrument when starting out. Anything less will cause you frustration.
Binoculars can be a cheaper option. For example, you can get a good entry-level set for as low as $150–200. While higher-end models can cost several hundred dollars or more. In this range, Terence Dickenson tells us to avoid zoom binoculars for astronomy, as optics performance doesn’t compare.
Finding the best location for stargazing
Your backyard could simply be the spot for night sky viewing, providing it is dark enough and gives you an opening to view the sky.
But if you live in light-polluted or closed-in areas you can try these tips I wrote about for stargazing in the city. Or, you might need to find a suitable place nearby.
You also might like to visit dark places in your travels — check out my list of dark spots to stargaze.
Getting started with stargazing
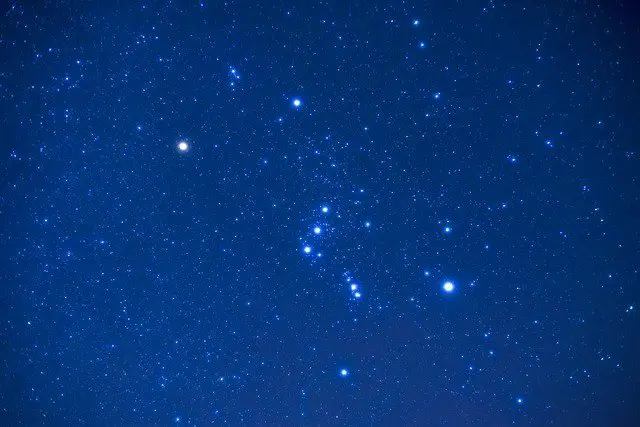
Simply looking at the night sky with your naked eyes is a good start. This is the best way to locate constellations and asterisms. See if you can identify bright objects that you see.
Using a star chart or app
You can start by star hopping — this is simply locating and moving between known objects in the night sky. For this, you can use your naked eyes, binoculars, or a telescope.
Use a sky map or memory to orientate yourself. You’ll be able to identify particular stars and planets using maps (or memory) or a phone app and start ‘hopping’ between them.
I’ve got a list of the best star apps and what they do – so you can find one that suits you and you can have fun with.
Adjusting your eyes
One thing you might not know when starting out is that you need to let your eyes adjust to darkness to get clearer views of objects when looking through a telescope, binoculars, or even with your unaided eyes.
It takes some minutes for this to happen and I give some tips for adapting your eyes in my article about using red lighting.
Using your telescope or binoculars
Using a telescope or binoculars for astronomy can be an incredibly rewarding hobby that allows you to explore the wonders of the night sky.
Whether you’re interested in observing planets, galaxies, or star clusters, using a telescope or pair of binoculars can help you get up close and personal with the cosmos.
I covered using binoculars for a rewarding stargazing experience in my article on exploring the night sky with binoculars.
Here are some hints on getting the most out of using your telescope.
Focusing your equipment
It might take a bit of practice to learn how to best focus your equipment. First up, align your telescope towards the target object with the help of your finderscope.
A finderscope helps you find that target object and most telescopes come with a standard type. (I upgraded mine for a better experience.) I recommend one that lets you see the target object right-side up.
Now onto focusing…
Most telescopes have a focus knob or mechanism that allows you to adjust the position of the eyepiece to achieve a sharp image.
Start by looking through the eyepiece and slowly turning the focus knob until the image comes into focus.
If you’re having trouble, you might like to read my article on focusing a telescope to get the best views.
About mounts and tripods
The common mounts for telescopes:
- Equatorial mount (EQ), which allows the telescope to follow a particular object as it moves in the sky with Earth’s rotation.
- Altazimuth (or alt-az), a two-axis basis (altitude and azimuth) movement to manually track objects with the Earth’s rotation.
For visuals of these, see my article exploring the different mount types.
Not only is the mount important, but the tripod needs to be sturdy to keep the optics stable for you to have a satisfying experience.
Telescopes usually come with tripods, some of these are flimsy. You’ll find value in my article on how to solve a shaky tripod, which includes recommended upgrades.
And, for ways to keep your binoculars stable – I’ve also written an article.
Adjusting magnification
Eyepieces offer a way to adjust magnifying power of your telescope, as I wrote in my article on choosing the best eyepieces.
Using a Barlow’s can reduce the number of eyepieces in your set. A Barlow lens increases the eyepiece magnification by 2x, 3x, or more, depending on the specifics. I explain more in my article on how to use Barlow lenses.
The limit of magnification possible with your equipment will govern applicable eyepieces.
And keep in mind that what you’ll see through the telescope will depend not only on the eyepiece but also on the atmospheric conditions at the time.
Taking Shots of the Moon and Planets
If you are wanting to do some astrophotography, you can attach your smartphone using special mounts as seen here to create a beginner astrophotography telescope.
A good guide, such as the Astrophotography Manual will instruct you on what gear to buy and how to best use your astrophotography equipment to capture the most amazing images of the celestial bodies.
Dobsonians are not useful for this and if you’re keen on astrophotography, the best telescopes for this are types that can automatically track objects across the sky.
Tracking objects across the sky
Some telescopes can be programmed for automatic positioning. You see some listed in my article covering telescopes for viewing planets. These are called Go-Tos, which require a bit of fiddling to use at first, but you don’t need knowledge of the sky for these.
For telescopes requiring manual positioning, you will need to know the sky in terms of the positioning of the objects at specific times.This is worth learning if you want to broaden your knowledge of astronomy and there are plenty of sky maps online and apps that can help with this.
Staying comfortable while stargazing
- If you need to travel, organize your time so that you are at your stargazing destination well before dark, to set yourself up. Consider safety needs also.
- Make it an exceptional experience — bring snacks and drinks
- Take a rug to lie on, some pillows, and a picnic basket with refreshments
- If you have a family, involve the kids
- Find out the local information, e.g. weather changes
- Dress for the weather
- You could inquire with astronomy groups online (or in person)
Get to know some of the amazing facts about the night sky.